

For Your New or New-to-You Semi Truck
Know your truck. Build the baseline. Prepare for the road.
Learn what to inspect, what to record, how to establish a mechanical starting point, what “normal” looks like on your truck, how to prepare for roadside problems, and how to set the truck up for the work and miles ahead.
Free Mile-Proven Guide • Built from Real-World Trucking Experience
A practical, in-depth guide for the first days and first miles with a new or new-to-you semi truck.
Before that first real load, you need to know exactly what you bought, establish where the truck stands mechanically, organize its records, decide what problems you are prepared to handle yourself, and set up the truck with the tools, supplies, paperwork, food, bedding, navigation, safety equipment, and everyday gear you will actually need.
This truck isn’t only your vehicle. If you’re going over the road, it is about to become your office, kitchen, bedroom, break room, toolbox, filing cabinet, and home away from home.
The goal isn’t to carry everything you own.
The goal is to know your truck, know what condition it is in, and not discover what you forgot when you are loaded, 700 miles from home, and sitting on the side of the road.
Explore the Guide
Work straight through from the beginning, or choose the section that fits where you are with the truck.
01 — Before You Roll
Inspection, starting condition, and what needs attention before the truck goes to work.
02 — Know Your Truck & Build the Baseline
IDs, components, parts, records, mechanical condition, and learning what normal looks like.
03 — Build Your Repair & Roadside Plan
Roadside repair decisions, service contacts, tools, tires, smart spares, fluids, and consumables.
04 — Prepare for the Road
Safety equipment, weather, delays, communication backups, emergency margin, and truck navigation setup.
05 — Set Up for the Work
Operating paperwork, ELD and log backup, freight equipment, work supplies, and basic PPE.
06 — Live in the Truck
Sleeper organization, personal gear, sleep, food and water, power, storage, and downtime.
07 — Final Mile-Proven Review — Before the First Load
Review the truck, baseline, roadside plan, equipment, work setup, and living setup before the first real load.
Working Through This With Your Truck?
The Mile-Proven Truck Setup Workbook is the fillable + printable companion to this guide, with organized pages to record your truck’s baseline, parts, maintenance, roadside plan, tools, sleeper setup, and more.
28 Pages • Fillable + Printable • $24.99
Before You Roll
Before you put a new or new-to-you truck under its first real load, establish what condition it is actually in. If you haven’t bought it yet, that starts before money changes hands.

Before You Buy It — Have the Truck Looked Over
If you have not bought the truck yet and you do not have enough heavy-truck experience to know what you are looking at, one of the smartest things you can do is have a competent heavy-truck mechanic or shop that you choose inspect it before money changes hands.
Not just somebody working for the seller. You want somebody looking at the truck with your interests in mind.
NEEDS FIXED BEFORE WORK
What needs fixed before this truck works?
FIX SOON
What needs attention soon?
WATCH / MONITOR
What should be watched?
NORMAL WEAR
What appears to be normal wear?
A Good Pre-Purchase Look-Over May Include:
- Engine condition
- Visible oil, fuel and coolant leaks
- Cooling system
- Turbo and charge-air system
- Aftertreatment/emissions system
- Active and stored fault codes
- Transmission
- Driveline
- Differentials
- Steering
- Suspension
- Air system
- Brakes
- Tires
- Wheels
- Wheel ends and seals
- Fifth wheel
- Batteries and charging system
- Electrical issues
- Frame and obvious structural problems
- Signs of neglected maintenance
- Signs of previous repairs that deserve a closer look
If possible, get the findings in writing.
That list becomes the beginning of your maintenance plan.

Already Bought It? Establish the Starting Point Before the First Load
If you already own the truck and did not have a thorough pre-purchase inspection, before the first real load is the next best time. If you don’t know enough yet to recognize glaring problems, have somebody who does look it over before you send it down the road under a load.
A driver operating a commercial motor vehicle needs to be satisfied before driving that the vehicle is in safe operating condition. That is part of the federal driver-inspection requirement in 49 CFR §396.13.

Passing Inspection Isn’t the Same as Mechanical Health
A current annual inspection matters, but it should not be mistaken for a complete mechanical health report. Passing an inspection does not tell you that the engine, cooling system, turbo, transmission, driveline, or every other major component is ready to run trouble-free for the next year.
Federal periodic inspections are required at least every 12 months for vehicles subject to that rule, but that is an inspection requirement—not a guarantee about the future health of every major component.
MILE-PROVEN RULE
“It passed inspection” and “I would send this truck across the country under a load tomorrow” are two different questions.
02 — Know Your Truck & Build the Baseline
A new-to-you truck comes with a lot of unknowns. Start turning those unknowns into a truck-specific reference you can actually use. At minimum, build three things from the beginning: a record of what the truck is equipped with, a confirmed parts reference, and a maintenance and repair history.
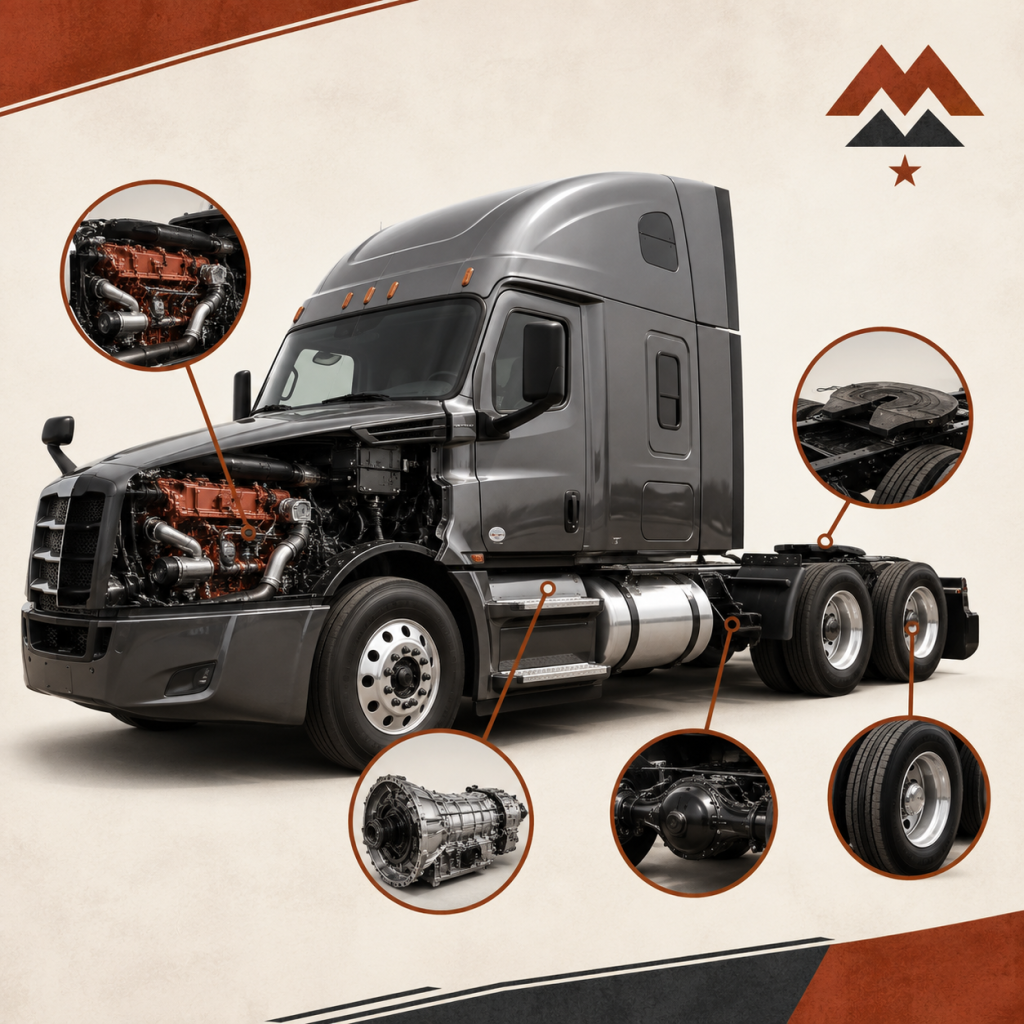
Truck ID & Component Reference
Record the truck’s identifying information and the major components actually installed in it. Heavy trucks can be built with different engines, transmissions, axles, suspension systems, air equipment, and other components, so year, make, and model alone may not always be enough when you need a part.
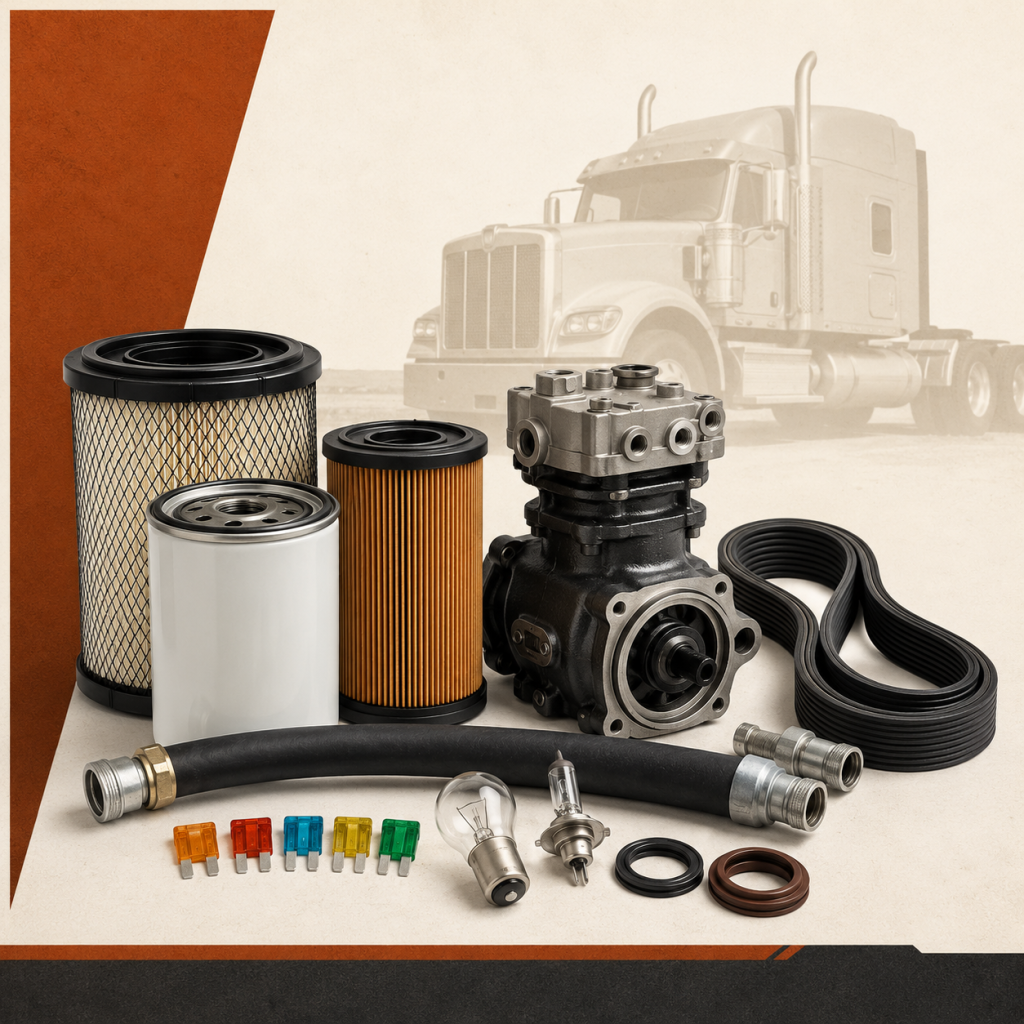
Parts Reference
Build a running list of the filters, belts, wipers, seals, fuses, relays, and other service parts that actually fit your truck. Add to it as you learn the equipment instead of trying to figure everything out again when something fails away from home.
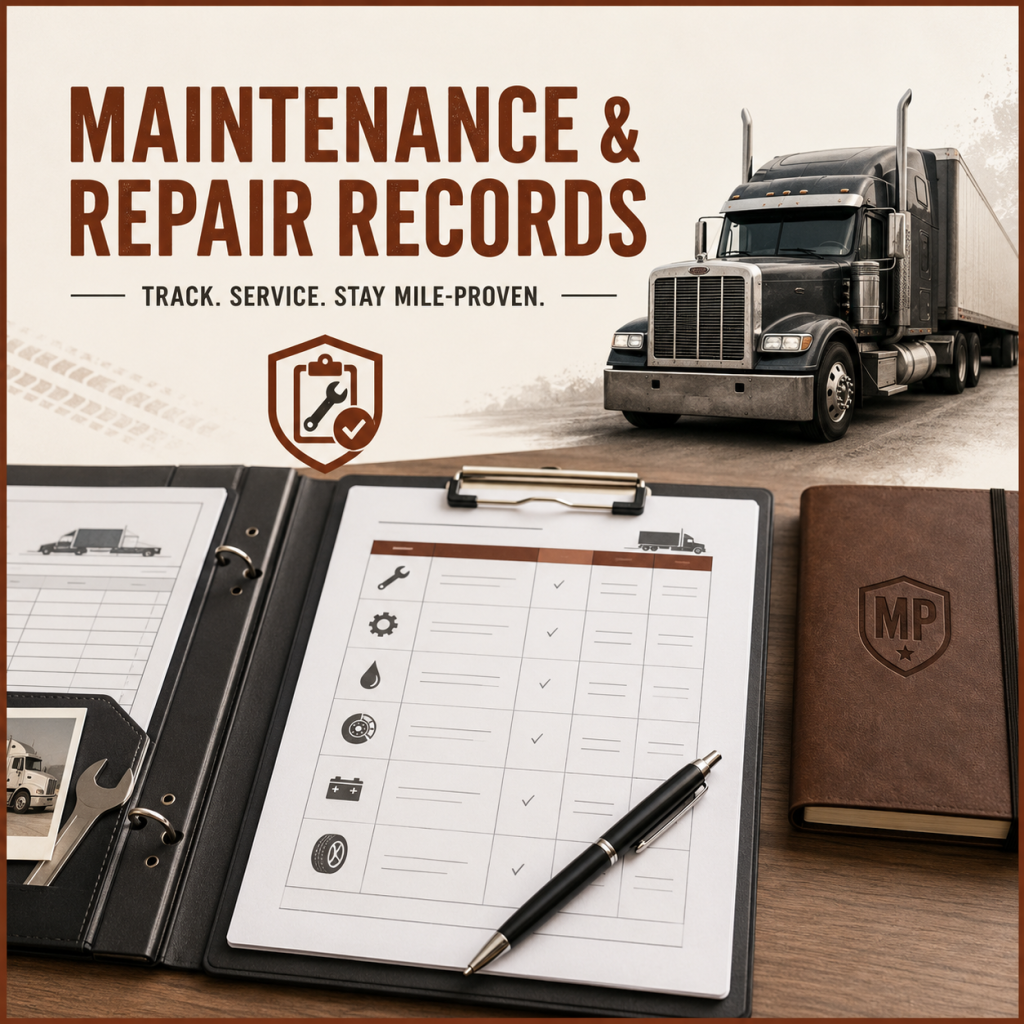
Maintenance & Repair Records
Keep track of what was inspected, serviced, repaired, or replaced, when it was done, the mileage, who did the work, what it cost, and what needs attention next. Good records help with maintenance planning, business records, and required vehicle-maintenance documentation.
Know Exactly What You Bought
Before you start relying on the truck, build a record of exactly what you own. Year, make, and model are a starting point, but heavy trucks can contain different engines, transmissions, axles, suspension systems, fifth wheels, air equipment, aftertreatment components, and other truck-specific equipment.
Build a Truck ID & Component Reference
Record or photograph:
- VIN/unit number
- engine make/model/serial
- Transmission make/model/serial
- Front and rear axle information
- Suspension
- Fifth wheel
- Aftertreatment equipment
- Tire/wheel setup
- Inverter installed? Type/rating
- APU installed? Make/model if useful
- Auxiliary battery setup
- Shore power if equipped
- AC/12V/USB outlets
- Any known sleeper electrical modifications
- and any other major truck-specific equipment
When you are standing at a parts counter five states away and somebody asks, “Which transmission is in it?” you do not want your answer to be, “I don’t know. It’s a 2018 Freightliner.”
MILE-PROVEN TIP
Take clear pictures of data plates and identification tags while the truck is parked, clean, and easy to work around. Create a folder on your phone named something simple like “Truck 12 — Parts & Specs,” and keep another copy somewhere besides that phone.
Service Parts Reference
Record or photograph:
- Engine oil filter
- Primary and secondary fuel filters
- Fuel/water separator
- Air filter
- Coolant filter, if equipped
- Belts
- Wiper blades
- Replaceable bulbs
- Common fuses
- Common relays
- Gladhand seals
- Truck-specific air fittings/supplies
- Other commonly serviced parts
Year, make, and model alone may not identify every component installed in a heavy truck.
Know exactly what you need—not just “a fuel filter for my Freightliner“.
Document a Mechanical Starting Point
When a truck is new to you, one of the most useful things you can do is document its mechanical starting point before you begin putting serious miles and loads on it.
You are not trying to predict every failure. You are recording what condition the truck is in right now so you have something meaningful to compare against later.
Record known wear, leaks, faults, fluid levels, upcoming maintenance, and anything you plan to watch.
Engine & Fluids
Check and establish a starting point for:
- Engine oil level and condition
- Coolant level and condition
- Visible oil leaks
- Visible coolant leaks
- Visible fuel leaks
- Belts
- Hoses
- DEF level and system condition where applicable
- Dash warning lights
- Active fault codes
- Stored fault codes when appropriate
- Unusual smoke or exhaust
- Unusual engine sounds
- When the next engine service is due
Cooling System
A cooling problem can take a working truck off the road quickly, especially under a heavy load or in hot weather.
Look over:
- Radiator
- Surge tank
- Coolant hoses
- Clamps and connections
- Fan and fan operation
- Visible condition around the water pump
- Signs of dried coolant
- Signs of previous leaks or repairs
- Correct coolant type
- Anything that looks wet, stained, loose, rubbed, cracked, or damaged
Air & Brakes
The truck’s air and brake systems deserve more than a quick glance.
Pay attention to:
- Obvious air leaks
- Whether air pressure builds normally
- Whether the system holds pressure normally
- Air lines and fittings
- Visible brake components
- Brake operation
- Trailer air connections
- Gladhand condition and seals
- Anything that sounds, feels, or behaves differently than expected
If you are not trained or comfortable evaluating commercial air-brake systems, have someone qualified inspect them.
Fifth Wheel & Coupling
Establish a starting point for the tractor’s coupling equipment too.
Look over:
- Fifth-wheel condition and mounting
- Locking mechanism and release handle
- Visible wear or damage
- Mounting hardware and surrounding frame area
- Air lines and gladhand connections
- Gladhand seals
- Trailer electrical connection
- Hoses and cables for rubbing, cracking, damage, or anything out of place
If you are not familiar with evaluating fifth-wheel wear, adjustment, or operation, have someone qualified look it over.
Tires, Wheels & Wheel Ends
Do not look only at tread depth.
Look at the entire tire, wheel, and wheel-end area:
- Tire inflation
- Tread condition
- Uneven or unusual wear
- Cuts
- Bulges
- Sidewall damage
- Embedded objects
- Wheel condition
- Visible wheel hardware
- Signs of loose or damaged components
- Hub or seal leakage
- Oil or grease where it should not be
- Unusual heat
- Unusual odor
- Anything that looks different from the other wheel positions
MILE-PROVEN TIP
Don’t just look at the tread. Look at the whole tire, wheel, and wheel end.
Steering & Suspension
Look over the steering and suspension for obvious wear, looseness, damage, or anything out of place.
Look for:
- Steering that feels normal and predictable
- Obvious looseness or damaged components
- Springs
- Air bags
- Shocks
- Mounts
- Bushings
- Visible hardware
- Uneven ride height or obvious lean
- Rubbing
- Unusual wear
- Anything bent, cracked, loose, or out of place
Lights & Electrical
Go through the truck and trailer electrical basics before the first real load.
Check:
- Headlights
- High beams
- Turn signals
- Brake lights
- Marker and clearance lights
- Hazard lights
- Horn
- Wipers
- Washer system
- Trailer electrical connection
- ABS warning indicators
- Battery condition
- Charging-system behavior
- Dash gauges
- Outlets and installed electrical equipment you expect to use
Establish a Starting Operating Reference
The mechanical starting point you just documented also gives you the beginning of a reference for how this truck looks, sounds, and feels before you put it to work.
While the truck is starting, warming up, building air, idling, and being road-tested where practical, pay attention to the gauges, sounds, vibration, steering, braking, shifting, and overall behavior you just inspected.
You will learn much more once the truck begins accumulating real miles and loads.
For now, establish what you reasonably can and investigate anything that does not seem right.
Do not label an unexplained problem “normal” simply because the truck still runs and drives.
MILE-PROVEN TIP
Give yourself a starting reference now so you have something meaningful to compare against later.
Start the Maintenance & Repair Record
Before the truck begins working, start the records you intend to keep with it.
If previous records came with the truck, organize what is useful.
If something important is unknown, record it as unknown rather than guessing.
Maintenance Schedule
Establish what you can about:
- Last known service
- Mileage at last service
- Maintenance due now
- Maintenance coming due soon
- Next service mileage or date
- Anything that should be checked again
- Important maintenance history that cannot be confirmed
An unknown service history is still useful information because it helps you decide what should be addressed when establishing the truck’s baseline.
Maintenance & Repair History
Start the truck’s repair history with the information you have now.
For meaningful maintenance or repairs, record:
- Date
- Mileage
- Problem or reason for service
- Work performed
- Parts replaced
- Shop or person who performed the work
- Cost, when useful
- Follow-up needed
- Notes
Include maintenance and repairs performed while preparing the truck for its first load.
That gives the record a clear starting point instead of trying to reconstruct the history months later.
Inspection Records
Keep applicable inspection documentation together and easy to find.
For carriers subject to the federal maintenance-record requirements, 49 CFR §396.3 includes requirements for maintaining certain identifying, inspection, repair, and maintenance records.
The practical setup step is simple:
Know what inspection and maintenance records apply to your operation, make sure the current ones are available, and decide where they will be kept.
MILE-PROVEN TIP
Do not wait six months to start the truck’s maintenance history. Start with what you know today.
Capture the Information That Was Hard to Find
As you identify and inspect the truck, you may uncover information that took some work to confirm—an unusual part number, fuse or relay location, fluid capacity, useful specification, modification, or something a mechanic told you to watch.
Add that information to the truck’s component, parts, maintenance, or notes records while you have it in front of you.
If you had to spend time finding the answer once, there is no reason to make yourself find it all over again beside the road.
Give the Truck’s Information a Home
You’ve now started building the truck-specific information, parts references, maintenance records, inspection records, and notes. Give all of it somewhere permanent to live.
Build a Working Truck Binder
A truck is not an office. Paper gets folded, dirty, stuffed into compartments, lost under seats, and carried in and out of shops. Give the important information for this truck a permanent home before you start accumulating it.
A simple three-ring binder with sturdy sheet protectors and clearly labeled sections can become one of the most useful tools you keep in the truck.
What Belongs in the Working Binder
- Truck ID and major component information
- Confirmed service-parts reference
- Current maintenance schedule
- Useful maintenance and repair history
- Current inspection records
- Truck-specific notes and specifications
- Roadside and service contacts
- Other truck information you routinely need away from home
Keep a Backup Somewhere Besides the Truck
The binder in the truck should be your working copy — the information you need while you are on the road.
But do not let the truck be the only place those records exist.
Keep a second copy of important truck information, maintenance records, repair history, inspection records, receipts, and other business documents somewhere outside the truck. That may be at home, at the shop, in your office, or in a properly organized digital system.
If the truck is damaged, stolen, broken into, or the binder simply disappears, you should not lose years of records with it.
MILE-PROVEN TIP
If the truck disappeared tomorrow, its maintenance and repair history should not disappear with it.
03 — Build Your Repair & Roadside Plan
Being prepared for the road does not mean you have to repair everything that can possibly break.
Some drivers are comfortable doing quite a bit of their own work. Others would rather call a shop or roadside service for anything beyond a simple repair. Either approach can work.
What matters is deciding before you are stranded what you are actually prepared to handle, what equipment you need to support that decision, and who you will call for the things you are not equipped to handle.
Decide What You Would Handle Roadside
Think realistically about:
- What repairs you already know how to perform
- What repairs you could safely learn
- What repairs require tools or equipment you do not carry
- What repairs you would never attempt on the roadside
- What work should go to a qualified shop
- What could affect a warranty, lease, carrier policy, or roadside-service agreement
- Whether you can safely perform the work where the truck is sitting
- Whether attempting the repair would create a bigger problem than calling someone
Being willing to work on the truck and being equipped to work on the truck are two different things.
Depending on your experience, tools, truck, and situation, that might include simple things such as:
- Replacing a fuse or relay
- Replacing an accessible light or bulb
- Replacing a gladhand seal
- Tightening or replacing a simple fitting you are trained to work with
- Replacing a wiper blade
- Handling certain minor electrical problems you understand
- Replacing certain belts, hoses, or filters if you know the procedure and can do it safely
- Other truck-specific repairs you have the tools and knowledge to perform
Do not build your roadside-repair plan around what somebody else can do. Build it around what you can safely and competently do.
Know When to Call Someone
There should also be repairs where your plan is simply:
Stop. Get the truck somewhere safe. Call the right person.
That may include work that requires specialized equipment, heavy lifting, working under the truck, brake or wheel-end work beyond your training, complicated electrical diagnostics, internal engine or transmission work, or anything you cannot safely diagnose and repair where the truck is located.
Have the Numbers Before You Need Them
You do not need to perform every repair yourself to be prepared. Being prepared also means knowing who to call, what information they will need, and having it ready before the truck is sitting somewhere it shouldn’t be.
Keep the numbers you may need before you need them:
- Trusted truck shop
- Dealer
- Parts supplier
- Commercial tire service
- Roadside repair
- Towing/recovery
- Insurance
- Carrier or dispatch
- Trailer repair
- Refrigeration service, if applicable
- Other truck-specific contacts
MILE-PROVEN TIP
Sometimes the most useful tool you have is knowing when not to turn the wrench and call someone.
A roadside repair that is within your ability can save time and money. A repair you are not prepared to do can turn a manageable problem into a larger breakdown — or create a safety problem.
Build a Tool Kit for YOUR Truck
Once you know what you are willing and able to repair, the tool kit becomes much easier to build.
A generic tool set is a place to start, but a commercial truck may require sizes and tools you would never use on a car or pickup.
Do not build the kit around what somebody says every trucker should carry. Build it around:
Your truck. Your repairs. Your experience. Your operation.
The goal is not to carry an entire shop. The goal is to have the right tools for the work you are realistically prepared to do.
Start With the Repairs You Plan to Do
Before buying more tools, think back to the repairs you decided you would actually attempt yourself.
If you are willing to replace belts, hoses, filters, fittings, lights, fuses, relays, or other basic components, make sure you have the tools needed to perform those specific jobs on your truck.
Then build from there.
A Practical Truck Tool Kit May Include
- Combination wrenches in the sizes your truck actually uses
- Metric and/or SAE socket sets as appropriate
- Large-drive sockets for truck-specific work
- Ratchets
- Breaker bars
- Torque wrench or torque wrenches appropriate for the work you perform
- Screwdrivers
- Torx and hex/Allen tools
- Pliers
- Needle-nose pliers
- Channel-lock style pliers
- Side cutters
- Adjustable wrenches
- Filter wrench that actually fits your filters
- Commercial-truck tire-pressure gauge
- Tread-depth gauge
- Multimeter or test light if you know how to use one
- Basic electrical-repair supplies
- Appropriate air-system fittings or tools only for work you are trained and comfortable performing
- Flashlight
- Headlamp
- Inspection mirror
- Utility knife
- Funnels
- Shop towels
- Penetrating oil
- Zip ties
- Quality repair tape
- Truck-specific specialty tools you discover you repeatedly need
Check the Sizes on YOUR Truck
This is where new owners sometimes get caught.
Do not assume the wrench or socket you need is in a normal automotive tool kit. Walk around the truck and look at the components you are actually willing to work on.
If a job requires a large socket, unusually long breaker bar, specialty wrench, special filter tool, or another truck-specific tool, find that out at home — not on the shoulder of the interstate.
MILE-PROVEN TIP
Do not build your truck tool kit by asking, “What tools should every trucker carry?”
Ask, “What can go wrong on MY truck that I am actually prepared to fix?”
That is a much better way to decide what earns space and weight in the truck.
Keep It Organized
A tool you cannot find when you need it is not doing you much good.
Give frequently used tools a consistent place. Keep specialty tools together, electrical supplies together, air-system supplies together, and anything small enough to disappear contained in a labeled box or pouch.
When you use something, put it back.
When you use up a consumable, replace it.
The best truck tool kit is not necessarily the biggest one. It is the one that contains the right tools when you need them.
Decide Your Tire Plan Before the Flat
This is a decision worth making before you are sitting on the side of the road with a flat tire.
Some drivers carry what they need to change a mounted wheel and tire assembly themselves. Others know from the beginning that a commercial tire service is going to handle it.
Either plan can work.
The important part is actually having a plan.
A commercial truck tire changes the equation. The wheel and tire assembly is heavy, the truck may be loaded, the tools are larger, and the place where the tire fails may be a long way from the controlled conditions of your driveway or shop.
Before building your tire setup, decide whether you are realistically prepared to handle a mounted wheel and tire assembly roadside.
If You Plan to Change It Yourself, Know What YOUR Truck Requires
Do not assume a jack and a big socket are enough.
Before relying on your roadside tire equipment, work through the job while you are at home where you can safely figure out what the truck actually requires.
Know:
- The correct lifting points
- What jack capacity is appropriate for the weight being lifted
- Whether you need a solid jack base or blocking for the surfaces you may encounter
- What wheel chocks are appropriate for your truck
- The correct socket size
- What breaker bar, extensions, or other drive tools you need
- Whether you plan to use an impact wrench
- How that impact wrench will be powered
- The proper wheel-installation procedure
- The torque specifications and equipment required for your wheels
- How you will handle and position the wheel and tire
- Where your roadside warning equipment will be while you work
Do not discover any of this for the first time on the shoulder of the highway.
The Ground Under the Truck Matters
A jack that works perfectly on a concrete shop floor may be a different story on dirt, gravel, soft asphalt, mud, snow, or an uneven shoulder.
The truck also may not be empty when the tire fails.
Think about the conditions you are actually willing to work in and what you would need to safely support and stabilize the truck.
If the location does not give you a safe place to work, that can make the decision for you.
MILE-PROVEN RULE
Knowing how to change the tire does not make every place a safe place to change it.
A Mounted Spare Changes the Job
Carrying a mounted spare can allow replacement of the whole assembly. Swapping an assembly is not the same as demounting, repairing or mounting the tire itself.
Keep the spare usable, periodically check:
- Tire pressure
- Tread condition
- Sidewall condition
- Valve and valve cap
- Wheel condition
- Correct tire size
- Correct wheel setup
- Whether it is appropriate for the position where you expect to use it
- Whether the equipment you carry can actually remove and install it
A spare that has been riding around forgotten for two years should not be assumed ready just because it is still hanging on the truck.
Both changing a mounted assembly and mounting or repairing the tire involve hazards and require the proper procedures and equipment. For employees who service commercial rim wheels, applicable OSHA requirements also include training for installing, removing, and handling rim-wheel assemblies.
If your plan is to carry a mounted spare and swap the assembly, learn the proper procedure for your truck and wheel setup and build your equipment around that specific job.
If the tire itself needs to be removed from the wheel, repaired, mounted, or otherwise serviced, that is where a commercial tire shop or mobile tire service will usually become part of the plan.
If You Are Calling Commercial Tire Service
That still requires preparation.
You should be able to tell the person on the phone what they are coming to work on.
Keep your truck and tire information somewhere easy to access, including:
- Tire size
- Tire position
- Wheel information when useful
- Whether the tire is flat, damaged, or has come apart
- Whether the wheel appears damaged
- Whether you have a mounted spare
- Your truck and trailer configuration
- Whether the truck is loaded
- Your location
- Any roadside-service membership or account information
- Commercial tire-service numbers you already trust
The more accurately you can explain the problem, the better chance the service truck has of showing up prepared for it.
Know When Not to Do It
- You may have the tools.
- You may know how to do the job.
- You may have done it many times before.
But if the truck is sitting on unstable ground, visibility is poor, traffic is too close, weather is dangerous, the truck cannot be safely secured, or something about the situation does not give you a safe working area, call someone.
A tire service bill is expensive.
A bad roadside decision can cost considerably more.
MILE-PROVEN TIP
Decide ahead of time whether tires are something you handle yourself. Then prepare completely for that decision.
If you are going to change them, carry the equipment and know how to use it.
If you are going to call someone, have the information and contacts ready.
Either way, do not let the flat tire be the moment you start making the plan.
Smart Spares — Not a Random Parts Store
Carrying spare parts can save a lot of time when something simple fails.
But that does not mean filling every storage compartment with parts you might someday need.
Space and weight matter in a working truck, and a spare part is only useful if it actually fits your truck and you have some realistic way to use it.
The goal is to carry smart spares.
Start With What Fits YOUR Truck
Do not buy a generic spare because the package says it fits “most Freightliners,” “most Cummins engines,” or “most semi trucks.”
Know what fits the equipment you actually own.
This is where the Parts Reference you built earlier starts paying off
Not every truck needs every item on that list. And there may be something unusual on your truck that deserves a place in the spare-parts box even though almost nobody else carries one.
Prioritize Small Parts That Can Create Big Problems
An inexpensive part can still stop the truck, especially worth considering carrying if small, inexpensive, hard to find, known to fit, or important enough to stop operation, some truck-specific part may deserve a place even if few other drivers carry it.
Some of these parts are:
- A filter plugs.
- A relay fails.
- A belt breaks.
- A gladhand seal starts leaking.
- A wiper comes apart in bad weather.
- A simple electrical component fails.
MILE-PROVEN TIP
A $10 or $20 part can create a very expensive day if it is the only thing keeping the truck from moving.
Carry Parts You Could Actually Do Something With
There is little benefit in carrying an internal engine component you have neither the tools nor the ability to replace beside the road.
Build your spare-parts supply around the same decision you used to build your tool kit:
What am I actually prepared to repair?
If you would replace a belt yourself, carrying the correct belt makes sense.
If you would change a fuel filter, carrying the correct filter may make sense.
If every repair involving a particular system is going straight to a shop, carrying a pile of parts for that system may accomplish very little.
There are exceptions.
Sometimes carrying a difficult-to-find truck-specific part can still be useful because a roadside mechanic or shop can install it.
But make that a deliberate decision rather than accumulating parts with no plan.
Do Not Forget Fluids & Consumables
A few basic fluids and consumables can be just as useful as the spare parts and tools you carry. Depending on your truck and the work you are prepared to do, it may make sense to keep reasonable quantities of:
- Correct engine oil
- Correct coolant
- DEF
- Windshield washer fluid
- Appropriate grease or lubricant
- Electrical or repair tape
- Hose clamps and commonly used hardware
- Penetrating oil
- Shop towels
- Hand cleaner
- Absorbent material for small spills
Know what fluids your truck actually requires. Do not assume oils, coolants, lubricants, or other fluids are interchangeable just because something is available when you need it.
The goal is not to stock a maintenance shop. Carry the things that realistically support the truck, the repairs you are prepared to make, and the problems you may need to handle away from home.
MILE-PROVEN TIP
Know what the truck takes before you need to add it.
Protect the Parts You Carry
A spare that gets wet, crushed, contaminated, or buried under everything else may not be much of a spare when you need it.
- Keep parts organized and protected.
- Label anything that is not obvious.
- Keep filters clean and sealed.
- Keep electrical parts dry.
- Separate fluids from paperwork, food, clothing, and bedding.
Periodically go through the box. Parts get used, packaging gets damaged, fluids leak, and belts age. If you change trucks, make sure the parts you keep carrying still fit the equipment you actually own..
Do Not Turn the Truck Into a Parts Warehouse
There is a point where preparedness becomes clutter. Every part you carry takes up space and adds weight. You cannot realistically prepare for every component that could fail on a commercial truck. Preparedness is not about trying to carry the entire repair shop with you.
It is about carrying the things that make sense for:
Your truck. Your experience. Your route. Your operation.
MILE-PROVEN RULE
Carry the parts that solve realistic problems — not every part that could theoretically fail.
A good spare-parts collection should become more specific as you learn the truck.
The goal is not to prepare for every failure a commercial truck could possibly have. It is to know what you are prepared to handle, carry the tools and parts that support that plan, and know who to call for everything else.
04 — Prepare for the Road
Emergency & Safety Equipment
Tools and spare parts help when the truck itself has a problem, but roadside preparation starts with having the basic safety and emergency equipment you may need when something happens away from home.
Keep the required safety and emergency equipment applicable to your truck and operation aboard, accessible, and in usable condition.
Depending on the truck and work you do, that may include:
- Required roadside warning devices
- Fire extinguisher appropriate for the vehicle and operation
- Reflective safety vest
- Basic first-aid supplies
- Reliable flashlight
- Headlamp
- Spare batteries or another way to keep lighting charged
- Tire-pressure gauge
- Basic cleanup or spill supplies appropriate for your operation
- Other safety equipment required by the work you perform
Do not bury the things you may need quickly underneath weeks of clothes, freight equipment, or sleeper supplies.
A flashlight is useful, but a headlamp is especially valuable when you need both hands for an inspection or roadside problem. It can make a simple job much easier when you are looking under the truck, checking an engine compartment, inspecting a tire, connecting equipment, or dealing with something after dark.
If your lights are rechargeable, make sure you have a charging method that does not leave you with no light when one power source fails.
MILE-PROVEN TIP
Emergency equipment only helps if you can reach it and it works when you need it.
Prepare for Weather & Road Conditions
The truck may be mechanically ready and still need to be equipped for the conditions you reasonably expect to encounter. Before putting the truck to work, think about the climates, seasons, terrain, and road conditions common to the areas where you expect to operate.
Depending on the operation, that may include preparing for:
- Extreme heat or cold
- Rain
- Snow and ice
- High winds
- Flooding
- Mountain conditions
- Road closures or long delays
- Other weather or road conditions common to where you run
Make sure the truck has the basic clothing, equipment, supplies, and emergency margin appropriate for those conditions.
MILE-PROVEN RULE
The truck does not have to be broken down for you to be stranded.
Sometimes the right decision is for the truck to stay parked. Having the basic supplies you need already aboard makes that much easier.
That keeps the weather preparation without becoming a trip-planning lesson.l.
Keep a Small Emergency Margin
Your normal food and water setup belongs with everyday life in the truck. Emergency supplies serve a different purpose.
Keep enough drinking water and simple food aboard to get through an unexpected delay without depending on a restaurant, truck stop, refrigerator, or cooking appliance.
Choose food you will actually eat and that requires little or no preparation.
How much margin makes sense depends on where you run, how long you normally stay out, the weather, and how easily you can restock. You do not need months of supplies for every trip.
You do need enough margin that a several-hour delay does not immediately become a food or water problem.
MILE-PROVEN TIP
Normal supplies are for the trip you planned. A small emergency margin is for the extra hours you did not.
Keep Communication & Charging Backups
A phone can become one of the most important tools in the truck.
It may be your:
- Communication with dispatch or the carrier
- Roadside-service connection
- Weather source
- Secondary navigation and map reference
- Camera
- Document scanner
- Customer contact
- Payment method
- Way to send your location
- Connection to family or help
Do not let one damaged charging cord, failed outlet, or dead battery take all of that away.
Consider keeping more than one charging cable, a spare vehicle charger and possibly a power bank just in case you are not able to charge your phone.
Make sure the backups you take actually work before you depend on them.
Keep the numbers you would have difficulty replacing—roadside service, towing, tire service, carrier or dispatch, insurance, and other important contacts—available somewhere besides a single device.
MILE-PROVEN TIP
A dead, lost, or damaged phone should not take your navigation, communication, roadside contacts, and backup plan with it.
Have a Plan if the Truck Cannot Idle
Do not build your road plan around the assumption that the engine will always be available for heat, air conditioning, electrical power, or charging.
There may be times when the truck is mechanically disabled. Know what your truck normally depends on for sleeper power and climate control, and think through what happens when that source is unavailable.
Your backup will depend on the truck, operation, and climate. It may include battery-powered lighting and charging, appropriate bedding or weather gear, an APU or auxiliary system where equipped, and enough basic supplies to manage without depending entirely on the engine.
This does not mean you need a complicated backup system for every possible failure.
It means you should know what you will do before the answer becomes:
“The truck cannot run, and everything I planned to use depends on it running.”
MILE-PROVEN RULE
“I can just idle the truck” is not an emergency plan.
Navigation — Set It Up Before the First Load
Navigation is part of setting up a commercial truck for work.
A route that works perfectly well for a car may not be appropriate for a tractor-trailer. Height, length, weight, restricted roads, grades, construction, and other commercial-vehicle limitations can all affect where the truck can reasonably go.
Before the first load, set up the navigation tools you intend to use, enter the truck information they need, and decide how you will verify a route when something does not look right.
Use Navigation Intended for Commercial Trucks
If you will be running regularly, use a commercial-truck GPS, truck-routing application, or another navigation system designed to account for commercial-vehicle restrictions.
Where supported, enter accurate information for the equipment you will be operating, including:
- Vehicle height
- Vehicle length
- Weight
- Number of axles
- Trailer information
- Hazmat information when applicable
- Other vehicle restrictions used by the routing system
Do not assume the settings are correct because the device came with the truck or another driver used it previously.
Check them yourself.
Also make sure the basic setup works before you leave:
- Device is mounted where you intend to use it
- Charging cord reaches and works
- Vehicle charger or power source works
- Software and maps are reasonably current
- Volume and display settings work for you
- Saved truck profile contains the correct information
A truck-routing system is a useful planning tool, but it should not be your only source of information.
Know and Record Your Actual Height
Do not guess at the height of the equipment you are preparing to operate.
Know the actual height of the tractor and trailer combination, and keep that information somewhere easy to reference.
If you pull different trailers or specialized equipment, the height may change with the setup.
Record the information with your truck or trailer reference information and enter the correct height into your commercial navigation system where supported.
This is one of those measurements worth knowing before the truck leaves the yard.
Have More Than One Way to Verify a Route
Depending entirely on one phone, one GPS, or one app creates a single point of failure.
Before you begin running the truck, decide what backup sources you will have available.
That may include some combination of:
- Commercial-truck GPS
- Truck-routing application
- Current road atlas designed for commercial trucking
- State DOT road and travel information
- Phone mapping application used as a secondary map or location reference
The goal is not to use several navigation systems at once.
It is to have another way to check questionable routing or continue planning if your primary system is unavailable.
Make Your Location Easy to Find and Share
Navigation also supports the roadside plan you built earlier.
Before the first trip, make sure you know how to quickly find and communicate your location from the devices you carry.
Know how to access information such as:
- GPS coordinates
- Highway or road name
- Direction of travel
- Mile marker when available
- Nearest exit
- Nearby town or cross street
- Customer or facility name
Make sure location services and other features you intend to rely on actually work.
If you use a roadside-service application, carrier system, or another service that can receive your location, become familiar with it while you are parked rather than trying to learn it for the first time during a breakdown.
Build Navigation Into the Truck Setup
Navigation equipment needs a permanent place just like tools, paperwork, and other equipment you expect to use regularly.
Before the truck goes to work:
- Mount the primary navigation device
- Set up the correct truck profile
- Confirm truck and trailer dimensions
- Test charging equipment
- Keep backup navigation available
- Make sure you know how to find and share your location
MILE-PROVEN TIP
Set up navigation around the truck you are actually operating — not the vehicle the system assumes you are driving.
05 — Set Up for the Work
A truck can be mechanically sound, prepared for roadside problems, and ready for the road and still not be set up for the work you are actually asking it to do.
Before the first load, think beyond the tractor itself.
Set up the paperwork, logging system, trailer equipment, freight gear, work supplies, and PPE your operation may depend on.
Do not equip the truck for somebody else’s job.
Build the setup around your truck, your trailer, your freight, and your operation.
Give Every Piece of Paper a Home
Paperwork becomes a mess quickly in a working truck.
Registration, inspection documents, permits, bills of lading, scale tickets, receipts, pickup information, delivery paperwork, and other documents can all start looking alike when they are stuffed into the same door pocket or compartment.
Set up a simple system before the paperwork starts piling up.
The system does not need to be elaborate.
It needs to make the documents you use while operating easy to find, keep current-load paperwork separate from everything else, and give receipts and completed paperwork somewhere to go.
MILE-PROVEN TIP
The best filing system is the one simple enough that you will actually use it when you are tired, loaded, and 1,000 miles from home.
A truck makes a terrible filing cabinet. Give the paperwork a home before it gives itself one.
Keep Current Operating Documents Together
Give the documents you routinely need while operating their own permanent place.
Depending on the truck, driver, carrier, cargo, route, and operation, that may include things such as:
- Driver license/CDL
- Applicable medical certification documentation
- Tractor registration
- Trailer registration
- Current periodic-inspection documentation
- Insurance information
- Applicable permits
- IFTA/IRP information where applicable
- ELD information and backup materials required for your setup
- Applicable exemption documentation
- Carrier or company information
- Other operating documents required for your particular work
Not every driver or operation needs every item on that list.
Requirements vary with the vehicle, operation, cargo, carrier, jurisdiction, and trip.
The important setup question is:
Do the documents you are expected to have aboard already have a place where you can find them?
Set Up Your ELD & Log Backup
If your operation uses an electronic logging device, make sure the system is actually ready before the truck begins working.
Do not wait until the first time rolling to discover that the device, account, truck profile, connection, or power source is not set up correctly.
Before relying on it, make sure you know:
- How to log in
- How the correct truck is assigned or selected
- How duty-status changes are entered
- How records are reviewed and certified
- How annotations or corrections are handled
- How records can be displayed or transferred when required
- What your procedure is if the ELD malfunctions
- Where the applicable ELD information and backup materials are kept
Keep the paper log sheets or other backup record-of-duty-status materials required for your setup available and easy to find.
Also test the equipment the ELD depends on.
That may include:
- Device or tablet
- Mount
- Charging cable
- Power source
- Bluetooth or other connection
- Application login
- Carrier-specific equipment or account information
MILE-PROVEN TIP
Learn and test the logging system while the truck is parked and everything is working.
A backup is only useful if you know where it is and how you are supposed to use it.
Keep Current Load Paperwork Separate
Give paperwork for the loads you will be hauling its own place.
Depending on the freight and operation, that may include:
- Bill of lading
- Shipping papers
- Pickup information
- Delivery information
- Scale or weigh tickets
- Load-specific permits
- Seal information
- Temperature instructions for refrigerated freight
- Hazmat documentation when applicable
- Customer or carrier instructions
- Other paperwork specific to that load
The goal is to keep load paperwork from becoming mixed with receipts, old paperwork, truck records, and documents from other trips.
A divided document organizer, enclosed folder, clipboard pouch, or another simple system can keep current load paperwork protected, contained, and easy to reach.
Receipts
A zippered document pouch, envelope, or other small organizer labeled RECEIPTS is very helpful. One that keeps them enclosed is useful just in case they get moved around and spill out.
Receipts are easy to lose in a working truck. They are often small and can disappear into cup holders, door pockets, bags, paperwork piles, or even get thrown away with other trash.
Business receipts can be an important part of bookkeeping and recordkeeping, so give them a place before you start collecting them.
Many drivers also photograph or scan receipts and organize them electronically. If you choose to keep digital copies, set up that system ahead of time so receipts are consistently captured, labeled, and stored instead of scattered through your phone.
Whether you also keep the original paper receipt will depend on the recordkeeping system and requirements you follow.
MILE-PROVEN TIP
A receipt is much easier to keep track of when it has somewhere to go the moment it comes into the truck.
Set Up a Simple Paperwork Reset Process
When you build the paperwork system, decide where completed paperwork and receipts will go when they are removed from the truck.
Set the truck up from the beginning with a system that can be cleared and reused.
Set Up for the Freight You Intend to Haul
The tractor is only one part of the operation.
Before the first load, think about the trailer, freight, and type of work you expect the truck to perform.
A setup that works well for dry van freight may be completely wrong for reefer, flatbed, tanker, livestock, car hauling, or another specialized operation.
Do not stock the truck around a generic idea of trucking.
Prepare it for the work it is actually going to do.
Start With the Trailer
What you need depends heavily on what is behind the tractor.
A dry van, reefer, flatbed, step deck, tanker, livestock trailer, car hauler, and other specialized equipment can create very different needs.
Before the truck goes to work, know things such as:
- Trailer type or types you expect to pull
- Important trailer dimensions and specifications
- Connections the trailer requires
- Equipment needed to work with it
- Routine checks appropriate for the equipment
- Supplies that commonly get damaged, lost, or used up
- Minor trailer problems you are prepared to handle
- Who you will call for trailer problems you are not equipped to handle
If you regularly pull several kinds of trailers, the truck setup may need to change with the work.
You do not necessarily need to carry everything required for every trailer all the time.
You do need to know what needs to change when the trailer changes.
Carry the Securement Equipment Your Freight Requires
Cargo securement is not one-size-fits-all.
Depending on the trailer and freight you expect to haul, equipment may include things such as:
- Straps
- Chains
- Binders
- Edge protectors
- Load bars or load locks
- Dunnage
- Tarps
- Bungees or tarp straps
- Coil equipment
- Blocking or bracing materials
- Cargo nets
- Other freight-specific securement equipment
Carry the equipment appropriate for the work you plan to perform and make sure you know how it is supposed to be inspected and used.
This guide is not a substitute for cargo-specific securement requirements, training, regulations, or manufacturer instructions.
The preparation question is simply:
Does the equipment aboard the truck actually match the freight I intend to haul?
Inspect the Equipment That Works the Load
Do not assume freight and securement equipment is ready to use simply because it came with the truck or is already sitting in a storage box.
Look over the equipment you intend to depend on.
Depending on what you use, check for things such as:
- Cuts or fraying
- Damaged webbing
- Broken stitching
- Stretching
- Cracks
- Bent hardware
- Damaged hooks
- Worn chain
- Damaged binders
- Rust or corrosion
- Missing or damaged identification where required
- Equipment that no longer operates as it should
Know what you have before the first load.
Remove or replace equipment that should not remain in service instead of allowing questionable gear to become part of the permanent truck inventory.
Reefer Freight Needs Its Own Preparation
If the truck will regularly work with refrigerated trailers, make sure the basic reefer-related setup is considered before the first load.
Know what equipment, supplies, paperwork, PPE, contacts, and reference information your operation expects you to have available.
Make sure reefer instructions, service information, and any supplies you expect to depend on have a place in the truck.
Flatbed & Open-Deck Freight Changes the Setup
Open-deck work can require substantially more securement equipment, protective equipment, tools, and storage than enclosed freight.
If that is the operation you are preparing for, make sure the truck has the basic chains, binders, straps, tarps, edge protection, dunnage, tools, PPE, and other equipment appropriate for the freight you reasonably expect to haul.
Do not assume a small generic collection of securement equipment will cover every type of open-deck work.
Carry the Everyday Supplies the Work Requires
Not every useful item aboard the truck is a major tool, replacement part, or piece of freight equipment.
Some of the things that keep work moving are inexpensive everyday supplies.
Depending on the trailer and operation, that may include:
- Spare trailer seals
- Appropriate locks
- Common trailer-related small supplies
- Electrical adapters or connectors appropriate for your setup
- Broom
- Small shovel
- Trash bags
- Basic cleanup supplies
- Tape
- Markers
- Pens
- Zip ties
- Extra forms or paperwork
- Other freight- or trailer-specific consumables your operation commonly needs
A reefer driver and a flatbed driver should not have identical supply lists.
Neither should a local delivery operation and an operation running specialized freight across several states.
Think through the kind of work you expect to perform and stock the basic small items that make sense for it.
MILE-PROVEN TIP
A small, inexpensive item can still cost a lot of time when the work cannot continue without it.
Keep Basic Work PPE Aboard
Even before you know exactly where the first loads will take you, it makes sense to have some basic work and safety gear aboard the truck.
Different customers, yards, plants, construction sites, oilfields, warehouses, and other facilities can have different requirements, but a few commonly useful items are worth considering as part of the initial truck setup.
Depending on the kind of work you expect to do, that may include:
- High-visibility or reflective vest
- Hard hat
- Safety glasses
- Work gloves
- Appropriate work boots
- Hearing protection
- Rain gear
- Other basic PPE commonly used in your type of operation
You do not need to prepare for every possible customer or industry before the first load.
The goal is simply to have the basic work gear that is reasonably likely to be needed already in the truck.
More specialized PPE or equipment can be added when a particular type of work requires it.
MILE-PROVEN TIP
Stock the basics now. Add specialized gear when the work actually calls for it.
Match the Truck to the Work
You cannot prepare one truck for every type of freight, every trailer, every customer, and every operation.
You do not need to.
Before the first load, make sure the paperwork, trailer and freight equipment, work supplies, and driver gear aboard the truck make sense for the work you actually expect to perform.
A dry-van setup will look different from a reefer, flatbed, tanker, car-hauling, or specialized operation. The important thing is that the truck is not simply stocked with “trucking stuff” — it is set up with a purpose.
MILE-PROVEN RULE
Prepare the truck for the work it is actually going to perform.
06 — Live in the Truck
If you are going over the road, the truck is more than the equipment you use to do the job.
For days or weeks at a time, the sleeper may also be your bedroom, kitchen, closet, storage space, and home away from home.
That side of the truck needs to be set up too.
Before the first longer trip, think about where your everyday belongings will go, how you will sleep, how you will handle food and water, what personal supplies you need, and whether the truck is set up to support the way you expect to live in it.
There is no single correct sleeper setup.
A driver who is home every few days needs something very different from a driver who may live in the truck for weeks.
Build the living setup around how you actually expect to use the truck.
Give the Living Space a System
A sleeper is a small space.
Without some organization, clothes, shoes, chargers, food, toiletries, and bags can quickly take over the bunk, passenger seat, floor, and storage areas.
Before leaving home, give the things you expect to use regularly a place.
That may include:
- Wallet and keys
- Phone and chargers
- Clean clothing
- Dirty clothing
- Personal shoes
- Shower bag
- Toiletries
- Food
- Cooking and eating supplies
- Cleaning supplies
- Laundry supplies
- Personal electronics
- Trash
You do not need every compartment labeled or an elaborate storage system.
The goal is to make the sleeper usable and make the things you use regularly easy to find.
Separate Clean From Dirty
Work around a commercial truck creates dirty things.
Work boots, gloves, coveralls, dirty clothing, and shop grime should not have to share space with bedding, clean clothes, food, and personal items.
Consider giving dirty items a dedicated place such as:
- Boot tray
- Laundry bag
- Washable bin
- Separate compartment where appropriate
- Another easy-to-clean storage area
Decide where those things will go before the truck is packed and ready to leave.
Plan the Storage Around the Driver Area
As you decide where everything will be stored, make sure the living setup does not take over the space needed to operate the truck.
Avoid choosing storage locations that interfere with:
- Pedals
- Controls
- Windows or mirrors
- Seats
- Entry and exit
- Normal movement around the driver’s area
Think about heavier items and appliances too. Give them a stable, appropriate place rather than assuming they will stay where you set them once the truck is moving.
The best time to find out that a cooler, bag, appliance, or storage bin is in the way is while you are setting the truck up at home.
Bring the Personal Gear That Makes Sense for You
Work clothes are only part of what you may need while living out of a truck.
Think about the things you normally use once the workday is over—when you shower, sleep, relax, walk somewhere, work out, eat somewhere away from the truck, or simply want to change out of work clothes.
Depending on how long you expect to stay out and how you normally spend your time, that may include:
- Everyday clothing
- Underwear and socks
- Comfortable walking shoes or sneakers
- Shower shoes
- Sleep clothes
- A clean change of clothes
- Gym clothes if you expect to use them
- Personal outerwear appropriate for the areas where you normally run
- Toiletries and grooming supplies
- Small day bag or backpack
- Other personal items you regularly depend on
Your work boots may be exactly what you need around the truck and still be miserable for walking several miles or spending an afternoon away from it.
You do not need to pack for every activity you could possibly do.
Bring what makes sense for the important things you do—and realistically expect to do—while you are living out of the truck.
Build a Shower & Laundry Setup
A little organization here can make a small sleeper much easier to live in.
Keep a Shower Bag Ready
Instead of gathering toiletries and clean clothing every time you need them, consider keeping one bag ready to grab.
Depending on what you use, it might contain:
- Soap or body wash
- Shampoo
- Toothbrush and toothpaste
- Deodorant
- Razor or grooming supplies
- Hairbrush or comb
- Shower shoes
- Towel
- Basic clean clothing
It does not need to be complicated.
The purpose is simply to keep the things you normally take with you to clean up in one place.
Give Laundry Somewhere to Go
Decide where dirty clothing will go before the truck starts filling up with it.
A laundry bag, vented hamper, or another container that is easy to carry can work well.
If you expect to stay out for longer periods, you may also want a small place for basic laundry supplies.
The goal is simple:
dirty laundry should have a home that is not the bunk or the passenger seat.
Set Up the Bed So You Can Actually Sleep
If the truck is going to be where you sleep, make sure the bed works for you before the first long trip.
Truck mattresses vary considerably, and a mattress that technically fits the sleeper does not necessarily make a comfortable bed.
Depending on the truck and your preferences, that may mean:
- Mattress or mattress topper
- Mattress protector
- Sheets that actually fit
- Comfortable pillow
- Lighter bedding
- Warmer bedding
- Other basic sleep items you normally depend on
This is not about building a luxury bedroom.
It is about making sure the place you expect to sleep is actually usable.
Check Curtains & Shades
Make sure the sleeper curtains, shades, or other coverings are present and work properly.
Truck stops, yards, rest areas, and customer lots are rarely completely dark, and some schedules may require sleeping during daylight hours.
This is an easy thing to check while setting the truck up.
Give Nighttime Items a Place
Consider a small permanent place near the bunk for things such as:
- Phone
- Charger
- Water
- Glasses
- Flashlight
- Other things you routinely need at night
And if possible, organize the sleeper so the bed does not have to become permanent storage.
MILE-PROVEN TIP
If the truck is going to be where you sleep, set up the bed before you need to depend on it.
Set Up Food & Water for Normal Life in the Truck
Think about how you normally expect to eat and drink while you are away from home.
You do not need to build a kitchen for somebody else’s habits.
Build a simple system around how you actually eat.
Keep Drinking Water Aboard
Think about how much drinking water you normally use and how easily you expect to be able to restock it.
The amount that makes sense can depend on:
- How long you normally stay out
- Where you operate
- Weather
- How much you drink
- Whether you also use stored water for coffee or food
Give the water a practical location where it can be stored securely.
Decide How You Will Keep Food Cold
If you plan to carry refrigerated food, decide what you are actually going to use.
That may be:
- Built-in truck refrigerator
- Portable 12-volt refrigerator
- Refrigerator/freezer
- Cooler
- Another appropriate system
Test it before the first trip.
Make sure it works, fits the space, and holds enough for the way you intend to use it.
Stock Food for the Way You Actually Eat
Think about what you will realistically prepare after a long day.
A complicated food setup that you never use only takes up space.
Start with the foods, drinks, and preparation methods that already make sense for you.
A few simple shelf-stable options are also useful so every meal does not depend on refrigeration or cooking.
Do Not Forget the Small Things
Depending on your setup, you may need things such as:
- Plate or bowl
- Fork, spoon, or knife
- Can opener
- Food-storage containers
- Paper towels
- Basic cleanup supplies
- Trash bags
The missing item is often something inexpensive.
A cabinet full of food does not help much if the one thing you need to prepare or eat it is still at home.
Give Trash a Place
Decide where trash will go and keep some extra bags aboard.
In a small sleeper, that simple choice can make a noticeable difference.
MILE-PROVEN TIP
Build the food setup for the way you really eat—not the way you imagine you might eat once you start trucking.
Make Sure the Truck Can Support Your Sleeper Setup
Knowing that the truck has an inverter or several outlets is only the beginning.
Before buying or loading appliances into the sleeper, make sure the electrical setup can actually support what you plan to use.
Think about equipment such as:
- Refrigerator
- Microwave
- Coffee maker
- Electric kettle
- Television
- Laptop
- Fan
- Heated blanket
- Phone chargers
- Other personal electronics
Check the power requirements of the equipment you intend to bring and compare them with the system installed on the truck. Some appliances use very little power. Others can take a large portion of an inverter’s capacity by themselves.
Know What Can Run Together
A system that can handle one high-draw appliance may not be able to handle several at once.
Figure that out while you are setting up the sleeper. You may find that you need to choose different equipment or simply avoid using certain appliances at the same time.
Remember That the Batteries May Be Supplying the Power
An inverter converts available battery power into AC power. It does not create energy.
If the truck is not running and another charging source is not available, electrical equipment in the sleeper may be drawing from the truck’s batteries or auxiliary battery system.
Know how the system on your particular truck is intended to work before depending heavily on it.
Be Careful With High-Draw Additions
If the existing system will not support what you want to use, do not improvise a high-current electrical installation just to make an appliance work.
Large inverters and other high-draw equipment need appropriate wiring, protection, connections, and installation.
If you are not qualified or comfortable evaluating that setup, have someone qualified evaluate or install it.
Test the Living Setup Before You Leave
Once the sleeper is stocked, try it while the truck is still at home.
- Turn on the refrigerator.
- Run the microwave or coffee maker if you plan to use one.
- Charge your devices.
- Use the lights.
- Make the bed.
- Close the curtains.
- Put the clothes, shoes, toiletries, food, and everyday supplies where you expect them to stay.
- Sit in the driver’s seat and make sure the living setup is not interfering with the cab.
You may discover that:
- An outlet does not work
- A charging cable does not reach
- The inverter cannot support the equipment you chose
- The refrigerator does not fit where you expected
- A storage bin blocks access to something else
- An item will not stay secure
- The bed becomes unusable once the truck is packed
- You forgot something simple that you use every day
Those are much easier problems to solve in the driveway than several hundred miles from home.
MILE-PROVEN TIP
Do not wait until you are living in the truck to find out whether the living setup works.
Prepare for Downtime
If you expect to spend significant time in the truck, keep one or two things aboard that make sense for how you actually use your off-duty time.
That might be a book, tablet, downloaded entertainment, study material, or a compact hobby or project.
If what you normally use depends on internet service, having something available offline can also be useful.
Keep this simple. Bring what you will actually use
Carry a Little Extra of What Matters
When you stock the personal side of the truck, simply avoid packing so tightly that an extra day away from home leaves you without something important.
A little extra of the things that matter most—clothing, socks, toiletries, essential personal supplies, charging needs, or other everyday necessities—can be enough.
How much makes sense depends on how long you normally expect to stay out.
Consider a Small Quick-Grab Bag
A small bag with a change of clothes, basic toiletries, and a charger can also be useful if you unexpectedly need to leave the truck somewhere.
It can be a separate overnight bag or simply part of the way you organize your shower bag.
Build the Living Setup Around YOU
There is no universal list that makes every sleeper properly equipped.
One driver cooks most meals. Another barely cooks at all. One stays out for a few nights.
Another may stay out for several weeks. One spends most off-duty time in the truck.
Another wants clothes and shoes that make it easy to go somewhere when time allows.
Before the first longer trip, look at the sleeper as a whole.
- Does it have practical places for the things you actually use?
- Can you sleep comfortably?
- Can you handle normal food and water?
- Can the truck power the equipment you are bringing?
- Do you have the personal clothing and supplies that fit the way you expect to live?
- Is the space still usable once everything is aboard?
You do not need to turn the sleeper into a house.
You need to make sure it supports the person who is going to live in it.
MILE-PROVEN TIP
Set up the sleeper for the life you actually expect to live in the truck—not somebody else’s version of it.
07 — Final Mile-Proven Review — Before the First Load
Before you put a new or new-to-you truck under its first real load, step back and look at the whole picture.
Do you understand the truck well enough, and have you prepared it well enough, to put it to work?
Know the Truck
- I know the truck’s basic identifying information.
- I have recorded important engine, transmission, axle, and component information.
- I have photographed or recorded useful data plates and identification tags.
- I have started a truck-specific parts reference.
- I know the correct fluids and important specifications for this truck.
- I know what major equipment and systems are actually installed on it.
Understand the Starting Condition
- I have looked over the truck closely enough to establish a mechanical starting point.
- I know what needs to be handled before work.
- I know what needs attention soon.
- I know what I intend to watch or monitor.
- Important maintenance that is due or uncertain has been considered.
- I have a starting reference for the gauges, sounds, feel, fluid levels, and other things I will continue learning on this truck.
The goal is not to prove that nothing can go wrong.
The goal is to know where you are starting.
Organize the Truck Information
- Important truck and component information has a permanent home.
- Maintenance and repair records have been started.
- Useful parts and specification information can be found without starting the search over again.
- Current operating documents have a place.
- Load paperwork will have its own place.
- Receipts have a system.
- Important records are backed up somewhere besides the truck.
If information will matter later, decide where it belongs now.
Have a Repair & Roadside Plan
- I have decided what roadside repairs I am realistically prepared to handle.
- I know which repairs I would rather leave to a shop or roadside service.
- I have the important service, tire, towing, and repair contacts I expect to need.
- I know where the truck information a shop or roadside service may ask for is kept.
- My roadside plan is based on my actual experience, equipment, and limits—not somebody else’s.
Being willing to work on the truck and being equipped to work on the truck are two different things.
Tools, Tires, Spares & Consumables
- My tool kit supports the repairs I actually expect to perform.
- I have checked important sizes and made sure the tools fit this truck.
- I have decided how I plan to handle a tire problem.
- If I intend to carry a mounted spare or change one myself, the necessary equipment has been considered.
- If I plan to rely on commercial tire service, I have a service plan and contact information.
- Useful truck-specific spare parts have been selected.
- Appropriate truck fluids and basic repair consumables are aboard as needed.
- I am not filling the truck with random parts and tools simply because somebody else carries them.
Your truck. Your repairs. Your experience. Your operation.
Prepare for the Road
- Required emergency and safety equipment is aboard, accessible, and usable.
- Reliable flashlight and/or headlamp lighting is available.
- Weather and road conditions that may affect the areas I expect to run have been considered.
- I have a small emergency margin of drinking water and simple food.
- Important electronics have more than one reasonable way to stay charged.
- Important contact information is available somewhere besides only one phone.
- I have considered what I would depend on for basic heat, cooling, charging, or necessities if the truck could not provide its normal idle or sleeper support.
The truck does not have to be broken down for you to be stranded.
Navigation Is Set Up for the Truck
- I have a navigation or routing system appropriate for commercial-truck use.
- The truck information used by the system is entered correctly where supported.
- I know and have recorded the actual height of the equipment I expect to operate.
- The navigation equipment is mounted and powered appropriately.
- I have another way to verify routing when needed.
- I know how to quickly find and share an accurate location if I need roadside assistance.
Navigation should be ready before the truck starts depending on it.
Set Up for the Work
- The current operating paperwork and logging system are ready.
- The ELD and applicable log backup are set up if required for my operation.
- I understand the basic trailer setup I expect to work with.
- The freight or securement equipment I expect to use is aboard and has been looked over.
- Basic work supplies appropriate for the operation are stocked.
- Common basic PPE and work gear that may reasonably be needed are aboard.
- The truck is being equipped for the type of work I actually expect to perform—not every kind of trucking that exists.
MILE-PROVEN RULE
Prepare the truck for the work it is actually going to perform.
Set Up the Living Side of the Truck
If the truck will also be your home away from home, make sure that side of it is ready too.
- Everyday personal items have practical storage locations.
- Clean and dirty gear have separate places.
- The living setup does not interfere with the driver’s area.
- Personal clothing and gear fit the way I expect to live while away from home.
- Shower and laundry supplies have a system.
- The bed, bedding, curtains, and basic sleep setup are ready.
- Food and drinking water have workable storage.
- Refrigerator or cooler equipment has been tested if I plan to use it.
- Basic cooking, eating, cleanup, and trash supplies are aboard as needed.
- The sleeper electrical system can support the equipment I intend to use.
- Appliances and charging equipment have been tested where practical.
- I have a little extra of the personal things that would matter if I stayed out longer than expected.
- The sleeper has been set up around how I actually expect to use it.
Do not wait until you are living in the truck to find out whether the living setup works.
One More Look Before It Goes to Work
At this point, you should not be asking whether you have purchased every possible tool, part, supply, or accessory.
Ask the more useful questions:
Do I know what truck I have?
Do I understand its starting condition?
Can I find the information that matters?
Have I prepared for the repairs and roadside problems I am realistically equipped to handle?
Does the truck have the basic safety, navigation, work, and living setup I expect to depend on?
Is there anything I already know needs attention before I put it under a real load?
If there is, handle it or make a deliberate decision about it.
The purpose of this guide is not to create a truck that can never have a problem.
No checklist can do that.
The purpose is to keep you from starting with a truck you barely know, an unknown mechanical baseline, scattered information, and a setup built entirely on assumptions.
The First Miles Will Add to What You Know
Once the truck begins working, the baseline will become more useful.
- During the first few weeks, pay attention.
- Recheck the things you decided to watch.
- Confirm what normal gauges, fluid use, regeneration behavior, sounds, vibration, shifting, and other operating patterns look like on this truck.
- If you learn a hard-to-find part number, record it.
- If you discover a tool or spare that would genuinely help, add it.
- If something in the work or sleeper setup does not work the way you expected, change it.
- Record maintenance and repairs as they happen.
- Remove equipment that proves unnecessary.
- Update information that turns out to be wrong.
You do not need to start this entire process over after 30 days.
You are simply making the baseline more accurate as the truck begins proving what normal actually looks like.
You do need to know enough about its current condition to make informed decisions, recognize meaningful changes, find important information, understand your own limits, and have a plan for the problems you are not prepared to handle yourself.
Preparation does not end when the first load begins.
Keep the records current, recheck what deserves watching, and refine the setup as you learn more about the truck and what actually works.
That is the Mile-Proven approach: know your truck, build the baseline, and keep refining what you know as the miles prove it.
Take the Mile-Proven Process Out to the Truck
This guide gives you the why, what to look for, and what to think through.
The Mile-Proven Truck Setup Workbook gives you a place to actually work through it with your truck in front of you.
Use the fillable and printable workbook while you inspect the truck, identify components, record part numbers and fluids, establish the mechanical baseline, build your roadside plan, set up the sleeper, and organize the information you will want later.
Instead of trying to remember everything from this guide or rebuilding your own worksheets from scratch, take the workbook out to the truck and work through the process one section at a time.
28 Pages • Fillable + Printable • Digital Download
$24.99
Know your truck. Build the baseline.
Frequently Asked Questions
What should I check before putting a new or new-to-you semi truck to work?
Start by establishing the truck’s actual mechanical condition rather than assuming it is ready because it runs, has a current inspection, or came from a dealer fleet or previous owner.
Look at the major systems, including the engine, cooling system, air and brakes, fifth wheel and coupling equipment, tires and wheel ends, steering, suspension, lights, electrical system, fluids, and known fault codes.
Then sort what you find into what needs attention before the first load, what should be handled soon, and what can be watched or monitored as you begin operating the truck.
Just as important, record major component information, start your maintenance and repair records, build a truck-specific parts reference, and prepare the tools, emergency equipment, paperwork, contacts, and supplies you will need on the road.
Does passing an annual DOT inspection mean the truck is mechanically healthy?
No.
A current periodic inspection is important, but it is not a complete mechanical-health report. It does not guarantee that the engine, transmission, cooling system, turbo, driveline, or other major components are trouble-free or will remain that way.
Required inspection compliance and understanding the truck’s actual mechanical condition are two different things — and both matter.
What records should I keep for my truck?
Build a system that lets you quickly find the truck’s identifying information, major component information, useful specifications, maintenance schedule, repair history, inspection records, confirmed part numbers, and important shop, tire, roadside, towing, and service contacts.
Keep the information you may need while operating with the truck, but do not let the truck be the only place important records exist.
Maintain a backup or master copy of important maintenance, repair, inspection, purchase, and business records somewhere outside the truck as well.
The longer you own and operate the equipment, the more valuable good records become.
What tools and spare parts should I carry in a semi truck?
Build the tool kit around your truck and the repairs you are actually prepared to perform.
A practical kit may include basic hand tools, truck-specific sockets and wrenches, reliable lighting, tire-pressure and tread-depth gauges, electrical tools if you know how to use them, and any specialty tools your particular equipment or repair plan requires.
Use the same thinking with spare parts.
Carry parts that actually fit your truck and can solve realistic problems. A confirmed belt, filter, relay, fuse, gladhand seal, or other small truck-specific part may be far more useful than filling storage compartments with parts you have no realistic plan to use.
Should I plan to change my own commercial truck tires?
That depends on your experience, physical ability, truck, equipment, working conditions, and whether you are prepared to perform the work properly.
Some drivers carry a mounted spare and the equipment needed to change a wheel and tire assembly. Others plan from the beginning to use commercial tire service.
Either approach can work. The important part is making that decision before the flat tire happens, having the proper equipment or service contacts ready, and knowing when roadside conditions make attempting the work a bad choice.
The goal is not to carry a repair shop. It is to carry the right things for your truck, your experience, and your operation.
What should I carry for emergencies and unexpected delays?
Prepare for more than mechanical breakdowns.
Useful preparation may include required emergency equipment, reliable lighting, weather-appropriate clothing, drinking water, food that does not require cooking, backup phone-charging options, basic first-aid supplies, and enough personal necessities to handle an unexpected delay.
Think beyond the original trip plan as well. Weather, road closures, customer delays, repairs, traffic, and other problems can turn a short stop into hours or an overnight stay.
The truck does not have to be broken down for you to become stranded.
How should I set up a semi truck for living on the road?
Set the sleeper up around how you actually live and work.
Give frequently used items a permanent place, separate clean gear from dirty work gear, prepare a shower and laundry system, make the bed comfortable enough to sleep well, decide how you will store food and water, and understand what the truck’s electrical system can safely and reliably power.
Also think about what happens when the normal plan changes — the truck goes into a shop, a trip runs longer than expected, weather changes, or you suddenly have hours of downtime.
If you run over the road, the truck becomes much more than transportation. It becomes your workspace, bedroom, kitchen, storage area, and home away from home.
Do I need different equipment depending on what freight I haul?
Yes.
A dry van, reefer, flatbed, step deck, tanker, car hauler, livestock trailer, and other specialized operations can require very different equipment, supplies, PPE, securement gear, and procedures.
Start with the work you actually expect the truck to perform.
Consider the trailer, freight, customer requirements, securement needs, PPE, common supplies, and the problems that are specific to your type of operation.
Build the setup around your truck, your trailer, your freight, and your job — not somebody else’s.
Is this guide only for new truck drivers?
No.
It is useful for someone buying a first truck or moving into owner-operator work, but the same process applies anytime a truck is new to you.
An experienced driver may know trucking very well and still not know the history, component configuration, normal readings, maintenance needs, quirks, or weak points of a truck they just bought or started operating.
Experienced drivers can use the guide to establish a new baseline, organize a recently purchased truck, rebuild an onboard tool and spare-parts system, update records, or apply lessons learned from years on the road to the next truck.
How do I know when my truck is ready to go to work?
There is no single item that makes a truck ready to go to work.
You should understand the truck’s current mechanical condition, know what needs attention, have its important records and specifications available, be prepared for the repairs you intend to handle, have a plan for the ones you will not handle, and carry the equipment and supplies that make sense for your operation.
But being prepared is not something you finish once.
As the miles add up, keep updating what you know. Add the part numbers you confirm. Revisit the things you are watching. Adjust your tools and spares. Update maintenance and repair records. Pay attention to changes in how the truck looks, sounds, feels, and operates.
That is the Mile-Proven approach: build the baseline, learn the truck, and keep improving the system as the truck and the road teach you.
Keep Building Your Mile-Proven System
This guide gives you the foundation.
But getting a truck ready for work is only the beginning. Maintenance comes due, parts need to be replaced, records grow, new problems show up, and the truck teaches you what deserves a permanent place in your setup.
That is what the Mile-Proven Center is being built for.

Keep Learning
Use the Mile-Proven Center for practical truck information, deeper guides, maintenance and inspection-preparation resources, roadside lessons, equipment setup, and other information designed to help you understand and take better care of the equipment you depend on.
Get The Mile-Proven Tools
The Exodus Trucking Community takes the next step beyond the free guides with practical resources you can actually use with your own truck.
Instead of building every checklist, worksheet, maintenance sheet, and reference page from scratch, members get access to ready-to-use resources designed to save time and help keep important truck information organized.
That includes resources such as:
- Mile-Proven Truck Setup Workbook
- Truck ID and component-reference worksheets
- Parts-reference sheets
- Maintenance schedules and service records
- Repair-history logs
- Contact sheets
- Truck-specific notes and reference pages
- Printable checklists
- Organized binder resources
- Deeper Mile-Proven guides and instruction
The goal is simple:
The information can be learned for free. The Community gives you the organized tools to put it to work.
The Mile-Proven Truck Setup Workbook is also available as an individual download for drivers who want the workbook without joining the Community.
Exodus Trucking Community members get the workbook included with membership.